Wednesday, June 25, 2014

The Basement & Waterproofing - Mid June 2014

Here are some photos of the basement after the flooring has been installed and the basement walls have been poured:


The exterior of the basement walls needed to be waterproofed before we could backfill.  We used Blueskin self-adhering waterproof membrane, which contains rubberized asphalt.  The pieces were cut to length and then adhered to the walls.


Basement Walls Concrete Pour - Second Week in June 2014

This was our third concrete pour, and our biggest pour yet.  We had 47 yards of concrete ordered, which came in five concrete trucks, and we hired a pump truck so that we could reach all of the walls.  The pump truck was massive; the boom had a vertical reach of 140 feet!  This was way more than we needed, but they sent a bigger pump than we ordered.


Concrete Pump Truck with the concrete boom.

Pump truck with the boom extended, ready to pour concrete.
The boom on the pump truck is a remote-controlled articulating robotic arm, and is controlled by the pump truck operator to place concrete with pinpoint accuracy.  Boom trucks such as this are capable of pumping at very high volumes and make this type of concrete pour reasonable.


The remote control for the boom being held by the pump truck operator (maroon tank top).
We were lucky to have some experienced helpers on this day, including our friend Mike and his Dad, who both have lots of experience with ICF home building.  We also had the help our our Dad's, Uncle Alain, and Steve's friend Kevin.  Everyone worked together and the concrete pour went smoothly!


Steve controlling the concrete pump truck boom.

Filling the ICF blocks with concrete.
 Concrete truck filling up the pump truck.


The walls after the concrete pour.

Installing the Floor - First Week of June 2014

Once the ICF blocks for the basement walls were completed, we needed to build the first floor.  This included placing some large beams.  The biggest beam was 42 feet long and weighted a few hundred lbs.  We were able to use the Caterpillar and the excavator to lift and place the beam safely.  We were really lucky because if the machine's had to reach 6" more, it would have been too far!

Installing the big beam after being lowered into place by the backhoe and excavator.


There were five beams that had to be placed, and we used the same technique for all of them, which worked really well.  Once the beams were placed, ledger boards had to be placed on the exterior walls.  The ledger boards are anchored to the concrete with anchor bolts.

Installing the ledger board
with the anchor bolts.
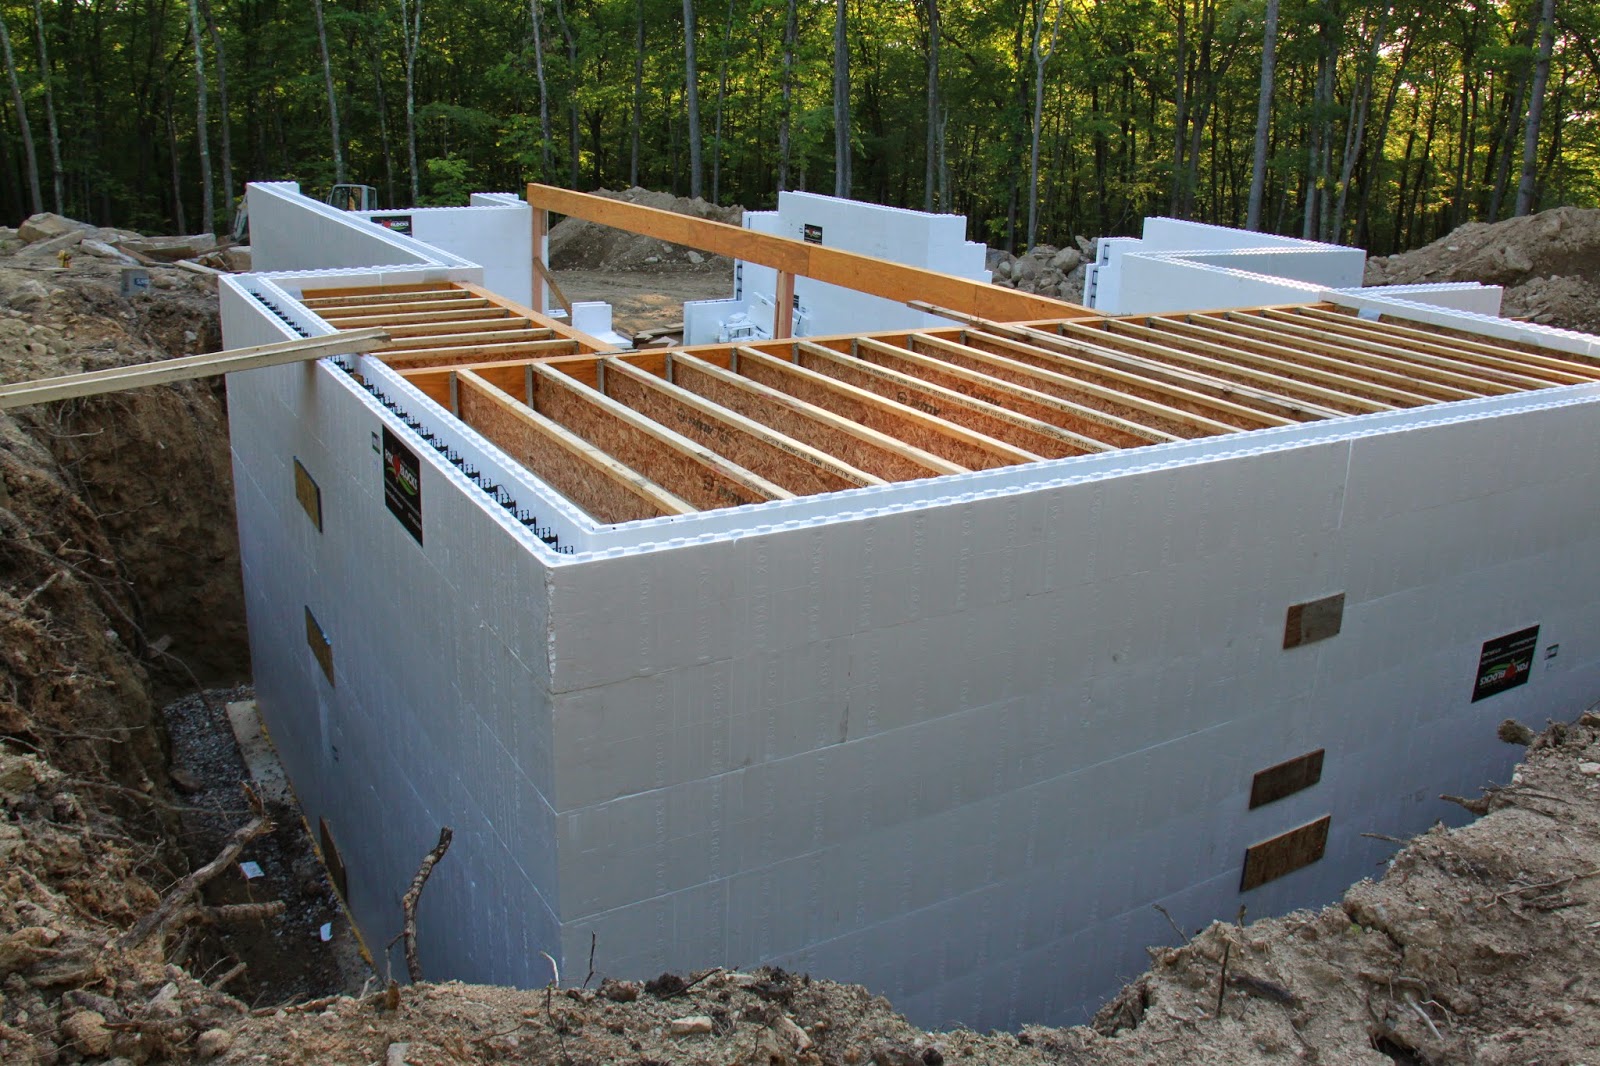
Holes cut in ICF blocks so the ledger boards can  be
directly connected to the concrete.


Once the beam and ledger boards are in place, the simpson joist hangers needed to be placed along the beams, and spaced accordingly.  We designed the floor so that the floor joists are hung inside the beams, which allows for a higher ceiling in the basement, without the intrusion of the beam into the room.


Next, the floor was installed.  We used AdvanTech subfloor panels.  We had a nice crew for this job: Steve's Uncle Raymond, Steve's Dad, my Dad and myself.  We used the Kubota with the forks to move the sheets of flooring, which was a big help.  Each sheet weighs 70 lbs, so this helped us to be more efficient, and minimize the amount of lifting.  Steve did all the measuring and cutting, I put the construction adhesive down,  Dad laid down the floor, and properly lined up all the tongue and groove joints, and Raymond nailed everything down.  We surpassed our goal this day, and completed the flooring installation!  


Floor installation complete!


Friday, June 20, 2014

The Build Up Begins! May 2014

We were really excited about the next step because we could start to build up!  This starts with stacking blocks!  Just like Legos!  The ICF (Insulated Concrete Forms) blocks serve as forms for the concrete, but they also serve as the house insulation, and provide 3" of insulation on both the interior and exterior of the house.  Building with ICF is also a green building method, and will require an estimated 44% less energy to heat and 32% less energy to cool than comparable frame houses.  And we are saving lots of trees :)


Pallets of the ICF Fox Blocks

Steve loves working with the Fox Blocks to build the walls.  The blocks are stacked tightly together and are interlocked end to end.  There are also special blocks for the corners.  The blocks need to be cut to fit in places, creating a joint that must be reinforced with plywood until the concrete is poured. 


Inside each straight block is six strong molded plastic ties made from Polypropylene regrind resin which secure the Polystyrene foam on each side together.   Each block is connected to all the surrounding blocks with special clips that must be installed as the blocks are stacked.  Once a single layer of ICF blocks is installed, horizontal reinforcing shell bars are inter-locked together in the ties of the blocks.


View of plastic ties
View of corner block with rebar


The walls went up quicker than expected, and with only one day of work, the basement walls were well on their way of being completed!  

Basement walls partially completed

Basement Floor - May 2014

The next order of business was the basement floor.  However, before we could complete the floor, we needed to lay the septic pipes which are under the concrete slab.  The placement of the pipes was important because it needed to line up with one of the walls in the basement.  We also needed to make sure that all the pipes needed were placed because it's certainly not something you can add afterwards!

Working on the proper angle for the septic pipe

Set-up for the leak test for the building inspector
We decided to pour the floor right away instead of waiting until the basement walls were completed so that we could have a solid surface to work on to build the walls.  Once the floor was properly leveled, a layer of stone was spread across the entire basement.  This doesn't sound like a big deal, but because we couldn't use the machines to bring in the stone and to spread it, we had to use wheelbarrows and lots of manual labor!

Basement with stone
Next, we placed a layer of 6 mil poly sheeting as a vapor barrier, and then a layer of 1" R-Tech Insulfoam, which is a green building product.  Adding this layer of insulation means that the slab will be surrounded by insulation, which helps to make the house more efficient, and as well as keep the floor warmer and dryer.  This will also help improve the energy star rating for the house.


Underslab insulation completed.

Finally, we were ready for the concrete floor!  We hired the help of PolySteel Northeast for this job, and the floors came out great!  But don't get me wrong, Steve and our Dad's were there working right along side for this job!

Metal keyed construction joints were used to divide areas of the floor (can be seen in above photo).  These served as starting and stopping places while pouring the floor, as well as contraction joints for the concrete.  This will help reduce or eliminate cracking in areas that you don't want to crack.

Using a bull float to level the ridges and fill the voids in the concrete.  This is done after screeding.  

Using a power trowel to apply a smooth finish to the concrete.