As I may have mentioned, we have a double back lot, which means we are set back from the road past two other lots. We also share our driveway with another lot. The transformer is located less than half-way up our driveway, and our driveway is 1/4 mile long, so we had a long distance to cover to run the power lines.
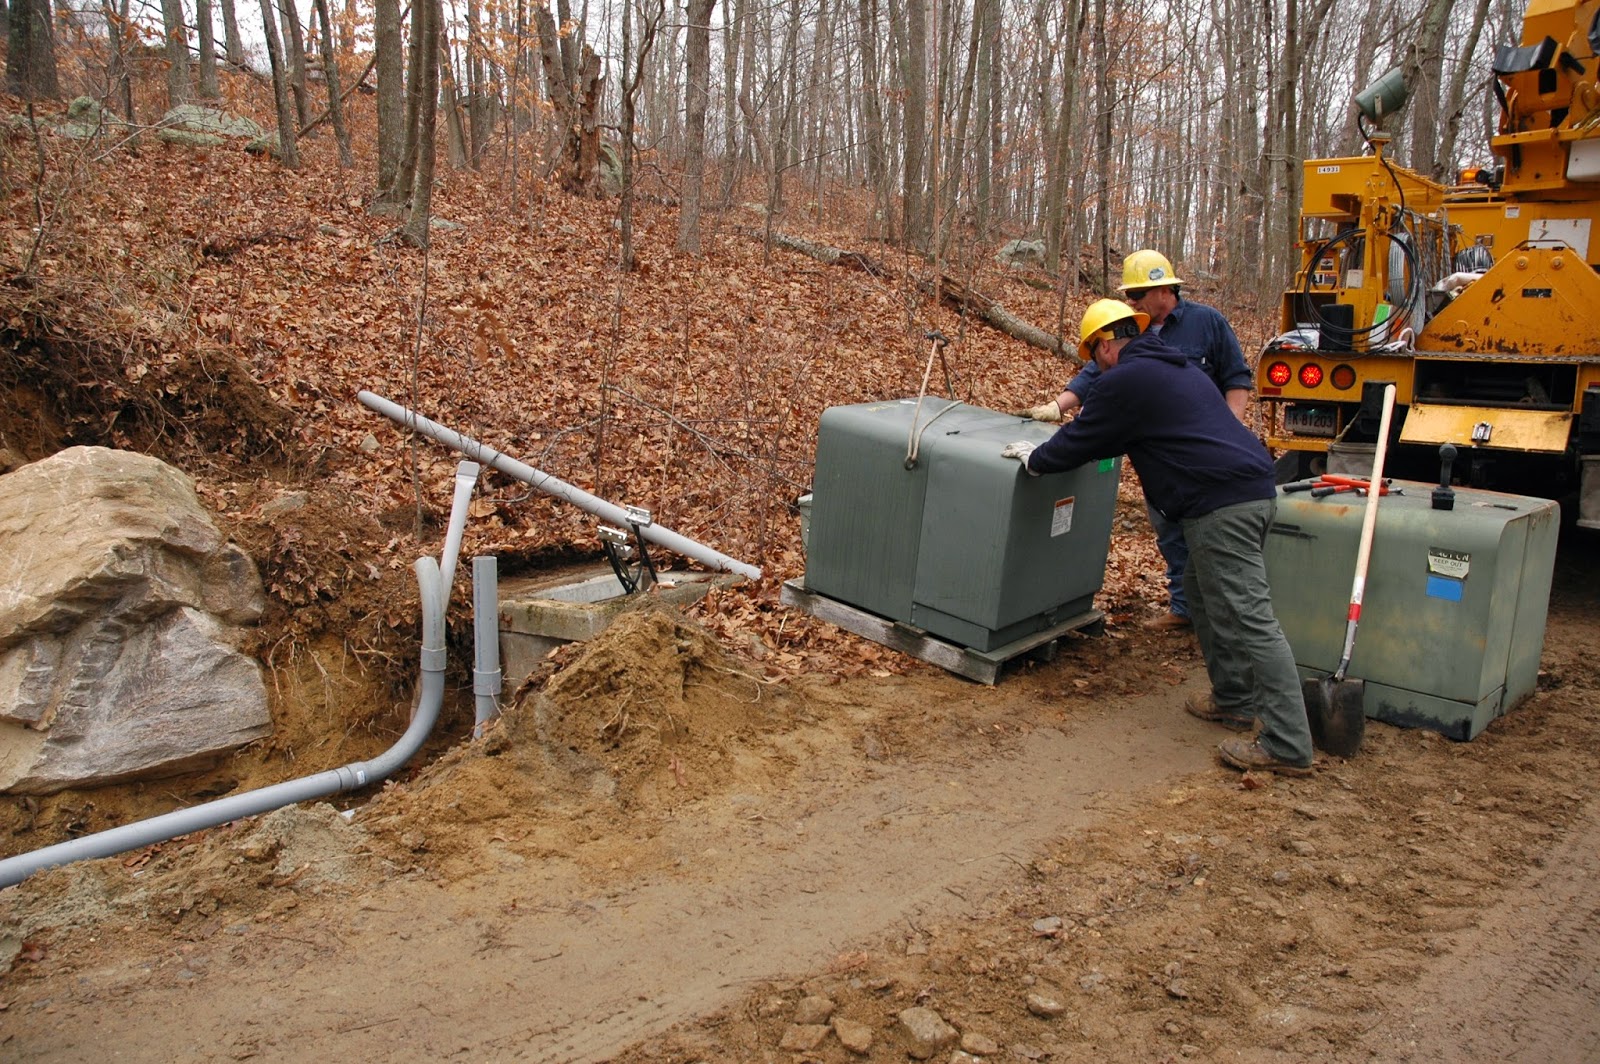
Challenge #1 - Where do we run the utility trench? We decided that the best route for the trench would be through the woods, and not along the driveway. This would give us a more direct path to the house, and therefore shorter distance, meaning less pipe, less digging, and not having to tear apart the driveway. We also have ledge directly under our driveway, so running the trench directly under the driveway was not really an option. So, we decided to run the trench up the hill and through the woods. The photo below shows the transformer box and the small portion of trench that runs along the driveway.

Challenge #2 - Digging the trench. The majority of the trench runs through the woods, which doesn't really seem like a big deal, except it goes up a significant hill and the hill is basically ledge. With some creativity, we were able to get the trench dug on the hill, and through the woods using the Kubota, which is smaller and more nimble than the Caterpillar. The problem was that we couldn't get the trench deep enough for the required two feet depth to bury the power wire. The solution… a jackhammer? We rented a jackhammer and hammered away at the ledge, which proved to be the most physically demanding job yet. The jackhammer was run ALL DAY. It certainly helped quite a bit, and a lot of rock was able to be removed from the trench.

The next step was to add a layer of sand to the bottom of the trench, and then to place the pipes. Three pipes had to be run in the trench - one for the electric, the second for phone, and the third for cable. So, for our 400' trench, we had to purchase 1200' of pipe and two loads of sand!
 |
| Some of the pipe for the utility trench. |
 |
| Sand to encase the pipes. |
 |
| Adding sand to the trench. |
 |
| Trench prepared for the pipes. |
The pipes are 10' in length and were glued together as they were placed in the trench.

Here are some photos of the pipes in the trench:


You can see in the photos below where the pipes are laying on ledge and we could not dig any deeper.


Since we have such a long run of pipe, and a 90 degree turn, we were required to install a precast concrete pull box for the electric line. I certainly didn't picture this in my mind when they said pull box. It's huge, and practically a man hole!

The Caterpillar was used to lift and lower the pull box into the trench.

The side of the form has cut out areas that were knocked out where the pipes would enter. Only the electric pipe runs into this; the phone and cable pipes go around it, as can be seen in the photo below. This box will be used by the power company when they run the electric cable through the pipes.

 |
| The pull box completed and backfilled. |
 |
| Portion of the trench over the ledge and filled with concrete. |
 |
| Looking down the hill towards the driveway. |
 |
| Backfilled Trench. |

The webbing is attached to a reel on one of the trucks and it pulls the cable through the pipe. Due to the weight and size of the cable, this would be impossible to do by hand.

They pulled the cable through the main section of pipe and into the pull box, where the pipe makes a 90 degree turn.

And there is the electric cable! From here, the cable needed to be pulled through the last stretch of pipe along the driveway and to the transformer.

Ever wonder what is inside all those big green boxes that you see sitting on concrete pads near houses? I certainly was curious. So, this is what it looks like… it's basically where the high voltage lines from the street come in and connect with the transformer, and then the transformer steps down the voltage to the lines that go to your house.

Unfortunately, the transformer that was in our box was not big enough due to the distance of our electric run, so we had to pay to upgrade the transformer. We also learned that we share this transformer with the neighbor. A bucket truck with a crane was used to move the transformer boxes.


The new transformer box is being moved into place.
And finally… the connection!

AND…. then we have power!

So, we went from the workhorse generator to real POWER! This was an exciting day, and a big milestone!
 |
| From Generator... |
 |
| To POWER (no meter yet!) |