Friday, May 22, 2015

Exterior Siding and Trim

The siding installation started on December 20th, right after the windows were installed.  The weather didn't cooperate during the first couple days of installation, so Steve started siding under the porch first.  Below is the first wall of siding completed!


We researched several types of siding, and decided to go with Certainteed Monogram Vinyl Siding and Certainteed Cedar Impressions.  Steve has worked with Certainteed in the past, and liked the quality and installation.  Once the siding was delivered, we were able to store all the materials in the garage, which was fantastic!

Certainteed Vinyl Siding

Certainteed Cedar Impressions

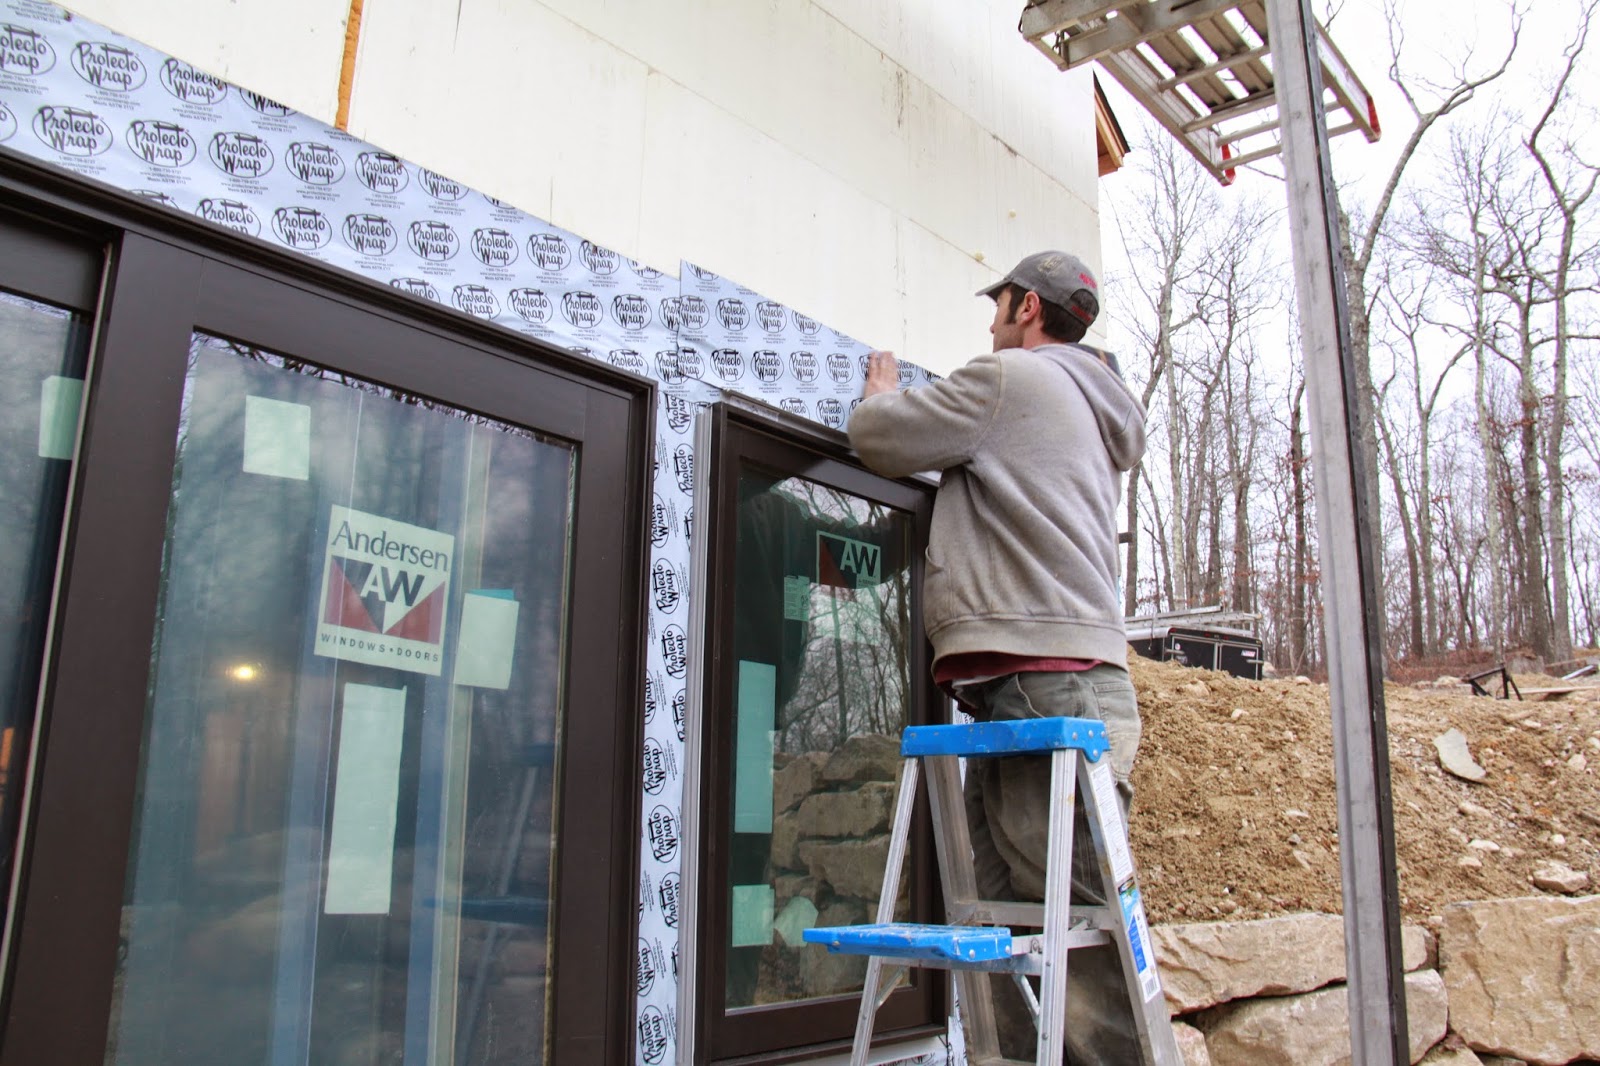
The first step was to waterproof the windows using flashing.  We used Protecto Wrap, which is a window and door flashing adhesive tape.  It is trimmed to fit, and then placed around the windows.


For the window trim, we choose the Anderson trim that is made to fit on the window frame.  The trim needed to be assembled, and then installed on the window frame.  The trim color is Prairie Grass, which also matches the Certainteed color trim we choose for the soffit and corners.

Lower level slider with flashing and trim.

We decided to use Cedar Impressions to accent certain walls of the house, including the living room wall, dining room and near the front door.  Not only are the Cedar Impressions an excellent quality, they help to break up the double 4 vinyl siding and add a more decorative flair.


Each piece of Cedar Impressions siding comes with it's own thermometer to ensure precise installation according to each panels temperature at the time of installation.  The indictor lines on the side line up with corresponding lines on the next panel for exact spacing according to temperature.  This allows the panels to expand and contract without buckling or being spaced too far apart.    


Below are some photos of the dining room wall being sided with Cedar Impressions.


Installing Cedar Impressions above the dining room window.


A skill saw on a track was used on a specially designed table to cut the siding to fit.  We were able to borrow this set-up from our friend Mike.  

A jig saw is used to make more precise cuts.


We chose the color Mountain Cedar for the siding, which worked perfectly to help create the mountain style look we are trying to achieve.


Once winter was upon us, siding was put on hold.  It was too cold and unsafe to work on ladders outside, so indoor projects moved to the top of the list…plumbing, electric, sheetrock, etc.

Steve started siding again just as things started to thaw… Below Steve is finishing up the siding around the front door.  This was in the beginning of April.


Once all the siding was completed, the next step is to install all the soffit.  The soffit goes under all the overhangs.  Before installing the soffit, nailers need to be put in place, then J-Channel and finally the pieces of soffit can be cut to fit.  The photos below show the soffit under the garage overhang.  We also installed 5 recessed lights here to provide light in the front of the garage.


The siding continues with some work to do in the back of the garage, and then all the aluminum trim.


More photos to be added once we start the trim! 

Monday, March 2, 2015

Electrical - February 2015

Once the roof was completed, we started on interior projects including electrical, plumbing, heating, etc. Although we were still waiting for our windows to arrive, the house was still pretty dry, so we started the electrical.  This was in October 2014.

One of the highlights of this project was seeing the first light turned on (below), on November 7, 2014.  

Steve and his Dad admiring the first light in the house!
The first challenge with electrical was ordering all the supplies.  It was not easy to know how much of each item to order, and which kind, so we consulted with my cousin Nathan, who is a licensed electrician, and he knew exactly what we needed!  We got our supplies ordered, and then a huge pile of supplies arrived to start the electrical.  Thank you for your help Nathan!


Electrical work is very detailed, intricate and time-consuming.  We were really fortunate to have help from Steve's Dad who happily tackled this project pretty much from start to finish.


Because we used ICF to build the house, the electrical work was not traditional, especially in the exterior walls.  Since the walls are concrete with insulation inside, channels had to to be cut in the insulation to be able to run all the electrical wires.  After using multiple tools to do this, the skill saw ended up being the best solution.  By the end of the day, Mike would be covered with white insulation from the ICF blocks!   


Here is a close-up of one of the boxes.  This box happens to be for our speaker wires, but you can see how it's recessed into the insulation.  The boxes are attached to the plastic studs in the ICF blocks.  All the wires were labeled and neatly wound until we were ready for switches and outlets.


We have over 40 recessed lights in the house, including the living room, hallways, bathrooms and exterior.  We used Halo 5" Air-Tight IC recessed lights.   

Sloped ceiling recessed lights in the living room.


View from above recessed lights in the hallway.
Outlets were installed to code.  There are lots of outlets - to guess, there is at least one outlet every 10' of wall, usually closer depending on the room.  


The electrical work on the interior walls could be done traditionally with boxes mounted to the 2x4 framing.  

And alas, the first light switch!  


And the first light!  We were pretty excited! (Notice, no windows yet!)


We have three electrical panels.  The main panel is 200 Amp and is located in the garage - this is where the electrical service from the road is connected.  In the photo below, you can see where the electrical service comes in through the wall and enters into the panel.  The smaller box on the left is for the generator.


From there, we have two 100 Amp sub-panels, both in the utility room in the basement.  Since two panels were necessary, one was wired specifically to be used with the generator.  Only items that were to run via generator were put on this panel.  Everything else went on the other panel. 


In the photo below, all the rough electric has been completed.  You can see all the boxes in the walls, lights and wiring in the kitchen island.  

February 28, 2015
Next for electrical will be the finish work… outlets, switches, covers, lights.  

Wednesday, February 18, 2015

Blizzard & Snow - Jan/Feb 2015

So, this may not be a typical house building blog post, since it's all about snow, but the weather definitely has an impact on any house building project.  We were cruising right through winter, getting some siding done on the house in January, and just when everyone was wondering why were weren't getting any snow… it came, and it came all at once!  It started with the "Blizzard of 2015."  It put a halt to any outdoor work at the building site, and put us in snow mode rather quickly.

Driveway after plowing.
The Blizzard began Monday evening of January 26th, and most of the snow fell on the morning of Tuesday, January 27th.  The state was closed with travel bans and just about every business that could close, did.  The Blizzard brought what was expected to our area of the state, dropping two feet of snow along with vicious winds and steep snowdrifts.   


Luckily, we had done our final snow preparations before we knew we were getting a blizzard, just after a smaller snow storm arrived.  The Caterpillar has been turned into a snow-plowing machine, and we were about to put it to the test!  We has already purchased a plow, and this was mounted to the front of the machine.  This worked out well, because it allowed the bucket to stay elevated and weigh down the plow.


Since the Caterpillar is two wheel drive, we knew extra traction would be necessary to successfully plow with this machine, so we purchased tire chains.  The tire chains are massive and weigh 70 pounds per tire!  It took quite a while to get them on the tires, cut them to fit, and then add the chain tensioners.  But, they definitely did their job, and the tractor worked great in the snow!


I ended up being at home during the Blizzard, and Steve worked for two days straight, so we were not able to clear out the driveway right away at the building site.  Back at home (photos below), the snow was pretty impressive!

Bedroom balcony filled with snow.
The snow was so deep in the road, that the road completely disappeared.  The winds blew snow drifts over 5' high, just in our road!

Looking down the road.

Looking up the road.

Snow on the beach.

Believe it or not, I needed my snowshoes to take a walk in the snow, otherwise I was sinking past my knees!!!


I was convinced that I would be stuck at home for at least a day… but then a bucket loader came to save the day!  A regular plow truck had attempted to plow the road, with absolutely no luck whatsoever.  Since I had never had a bucket loader need to plow me out, this was definitely picture worthy!

Plowing the road with the bucket loader.
This machine certainly didn't have any trouble with all this snow.  After a couple of scoops that were dumped across the street, he went right up the road!

This machine is bigger than it looks!

Done!
Other than the snow plowing tractor, the other winter project we took on was installing a wood stove in the workshop area of the garage.  It was really cold in the house, and propane heat is really expensive, especially when there is a big pile of wood outside!  We had an old wood stove that was handed down to us… a Riteway Model 37.  It's been refurbished, and although this wood stove is old, it's a workhorse!  It fits 24" logs and is rated for 73,000 BTU's.  I don't know the year it was manufactured, but it's at least 25 years old.  This stove heated my aunt's house for years, and it still puts out some serious heat.  The garage roof is not insulated, so we loose some heat, but it's still able to heat up the garage, and it's certainly nice to warm up next to a wood stove!  It was well worth the extra effort to get this permit, which took a month to get approved!


So, the snow decided to keep on coming.  One week later, we got another storm on Monday that closed schools, and kept me home from work… about 6-12 inches across the state, and lots of ice in this area.  Luckily, the Caterpillar plow was working great and we had no problems plowing out the driveway at the building site.   


One week later… a 3 day snow storm arrived.  More snow and sleet created icy conditions.  So, we concentrated on inside work at the house… and also decided that it would be a good time to take a short break from working on the house and take advantage of all the snow!  We escaped to Vermont for two days over Valentine's Day weekend to ski at Sugarbush and Mad River Glen, and it was FANTASTIC!  There's nothing like fresh powder and awesome ski mountains to rejuvenate you!

Mad River Glen Selfie
Tree Skiing at Mad River Glen
The weekend of our ski trip brought more snow, and there are still lots of snowflakes in the upcoming forecast!  It looks like the snow will be here for a while, but we have a lot of inside work to do.  The last stretch of homebuilding is fast approaching… the finishing stage, and that is super exciting!

February 15, 2015
More updates to come as we finish up with plumbing, electrical and everything else in the walls before sheetrock!